How To Install a New Furnace In Canada
People of Canada, like the other parts of the world, are staying back home more often after the pandemic hit. Appliances like furnaces, air conditioners, etc., are more vital now than ever. For a smooth winter, you should invest in optimal furnaces, install and maintain them, and replace them on time, especially if they have been in service for more than 15-17 years.
How To Install A Furnace In Your Home
After buying an ideal furnace, the next step is understanding its step-by-step installation process for efficient functioning. Furnace installation can take 4-8 hours, more or less, depending on what type of furnace you have. Let’s break down the furnace installation process into bite-sized practical content.
Phase 1: Remove the old furnace
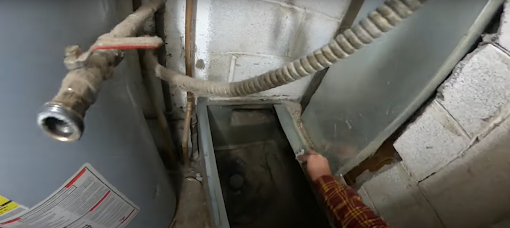
The first step is to remove the old furnace if you have any. Carefully turn off the power and gas supply before starting the removal process. The primary elimination while removing the old furnace is of the items connected to the central unit like gas lines, electrical wiring, etc. After removing the old furnace, clean the entry points to the ductwork and evaporator coil for the smooth installation of a new furnace.
Phase 2: Pre-installation process
The pre-installation step is much more than removing the old heating system and might take around 1-3 hours. The process involves:
Venting: Efficient venting is necessary to drain the carbon monoxide and other residual gasses out of the house. Ensure all the laws relating to venting and piping have been complied with and make a provision for additional vents. Use a gas leak detector to find any leaks.
Ductwork modification: Verify the existing ductwork can accommodate the airflow of the new furnace. Check both the supply of the air going into the air ducts and the passage of air going back into the blower motor. Ensure the connection between the new furnace is air sealed; use metal foil tape or duct sealant to prevent leaks.
Sizing: Ensure the size of the new furnace is accurate for the place. Take a heat load calculation to ensure the new furnace is neither undersized nor oversized.
Site preparation: Remove any object or device that could obstruct the airflow. Utilize additional vents if necessary. Keep away all the things that could catch fire and ensure wiring, gas lines, and everything are well set for the installation.
Phase 3: Furnace Installation process
Before starting the installation process, peruse the product instructions and follow them diligently. The general steps for installing a furnace are as follows:
Furnace positioning
- Make the appliance stand on a solid surface to prevent possible accidents
- After setting the furnace, cut a hole in the side for the filter
- Align the new furnace with the existing plenum and level everything
Electrical connection
- Follow construction codes by manufacturers while making electrical connections.
- Turn on the furnace power supply and use a voltmeter to ensure the circuit is complete and the voltage is as per the requirement.
Fuel line
- This step might take 1 to 3 hours. Furnaces may use different fuels for power depending on the type.
- For gas lines, make pipe fittings by cutting holes in the surface (follow the manual). Install a gas supply line capable of supplying 4-7 million BTU per hour. Use flexible pipelines or stainless steel lines for connections.
Complete setting up
- Finalize the wirings to the thermostat and accessories
- Drain the furnace once after successful configuration
Commissioning of the furnace
- Commissioning is a critical step of around one hour that one should not avoid
- Calculate the pressures and other variables like temperature, static pressure, BTUs, etc., and ensure everything is within the manufacturer’s range
- Check if the power on the lights remains lit and does not flicker.
- Commissioning helps to review the furnace and avoid premature failure and inefficient performance in the future.
Having a complete idea of how the installation process works might be helpful. However, installation involves specialized expertise. Thus, one should prefer professional help for the process. Installation made by any rookie installer may cause critical problems in the future. You should hire a certified HVAC technician with years of experience installing furnaces; Smile HVAC is your ideal partner.
Video – How to install a new furnace
5 Tips To Remember While Installing Furnace.
1. Choose your Furnace Wisely
There are three types of furnaces in the market to choose from, depending on your needs and budget. It would be best if you put a lot of thought when selecting a furnace for your home’s needs.
The three types of furnaces in the market include electric, gas, and oil furnaces.
- Electric furnaces: Considerably small and extremely easy to install. These home heating systems are also energy efficient and work best in areas that don’t encounter harsh winter weather.
- Gas furnaces: Standard among most homeowners and are ideal for areas with intense winter weather. They are energy efficient and can quickly heat your home. Although they are more expensive to install than electrical models, they have lower operating costs. However, it’s important to note that these heating systems come with extra expenses like regular maintenance, annual inspections, and replacing filters.
- Oil furnaces: Do well in areas with harsh winter climates. Because they use oil, these systems are not immensely popular among homeowners due to instability in oil prices. Plus, they are time-consuming and come with an additional cost of a fuel storage tank. Nonetheless, they have low monthly operating costs.
2. Optimal Furnace Installation: Location and Foundation
After selecting the right furnace, the next crucial step is choosing the perfect installation spot. The location depends on your furnace type, each with specific requirements.
Basement Installation: Elevate the furnace at least 4 inches above the basement floor to protect against potential floods.
Attic Installation: Place a drain pan beneath the furnace for attic installations to manage leaks effectively.
General Guidelines: Ensure a clear installation space. Remove obstacles, sweep the area, and keep children away during the process.
Foundation Optimization: Establish a stable foundation using rubber isolation pads to minimize operational noise, ensuring a quieter experience. This step contributes to a smooth and efficient furnace installation.
3. The Installation Process
After choosing a suitable location, the next step is to install your new unit. To do this, you first need to determine where the drain and duct will run.
To position, the furnace unit, consider where the condensate drain will run. Once you decide, arrange your furnace slightly sloping the condensate drain. Something else that you need to decide is where the air duct will be.
Usually, the air duct is placed on the side or bottom of the furnace. For this, you will need to cut a hole into the furnace. A professional HVAC to help with this is essential because the last thing you want is to cut the wrong-sized hole on a new unit.
4. The Connection Process
If you choose the gas unit, you need to connect the furnace to your home’s ducting system. Use a duct sealant to seal any connection with the system. You can also use metal foil tape for this. Make sure that you connect the ductwork to the surface appropriately to prevent damaging them.
Upon connecting the duct system to your unit, you also need to connect your vent pipes to the Furnace unit. Position the vent pipe so that it slightly slopes towards the Furnace to ensure that condensation drains safely and effectively.
If you are installing a gas furnace, make sure that there are adequate ventilation and shutoff. Once complete, inspect the furnace to ensure that there are no leaks.
5. Furnace Testing
After completing the connection process, it’s now time to test the Furnace and see if it’s working correctly and safely as it should. To do this, run the unit on a heating cycle to ensure that the temperature output meets the manufacturer’s specifications.
It is also here that you will check for any gas leaks on the gas line. Also, see to it that there is proper draining on the condensate drain.
FAQ About Furnace Installation
Do I need a permit to install a furnace?
In most cases, yes. It is important to check with your local building department to determine what permits and inspections are required for furnace installations in your area.
Can I install a furnace myself?
It is not recommended to install a furnace yourself unless you have experience and expertise in HVAC installations. Furnace installations can be complex and may require specific tools and equipment. It is best to hire a licensed and experienced HVAC professional to ensure the installation is done safely and correctly.
How long does it take to install a furnace?
The duration of a furnace installation can vary depending on factors such as the type of furnace being installed, the size and layout of your home, and any necessary modifications to the ductwork or electrical system. In general, a typical furnace installation can take anywhere from 4 to 10 hours.
What are the steps involved in installing a furnace?
The steps involved in installing a furnace can vary depending on the specific furnace and the layout of your home. However, some general steps include:
How much does it cost to install a furnace?
The cost of installing a furnace can vary depending on factors such as the type of furnace being installed, the size and layout of your home, and any necessary modifications to the ductwork or electrical system. In general, the cost of a furnace installation can range from $2,500 to $7,500.
How often should a furnace be replaced?
The lifespan of a furnace can vary depending on factors such as the type of furnace, the quality of installation and maintenance, and the frequency of use. In general, furnaces can last anywhere from 15 to 30 years. It is recommended to replace a furnace if it is over 15 years old, has significant damage or wear and tear, or is not functioning efficiently.