How to install a smart thermostat?
![]()
![]()
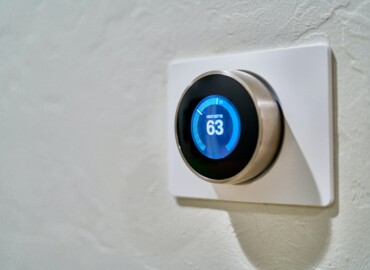
![]() The smart thermostat is a great invention of today’s modern technology, which has completely changed the concept of heating and cooling systems. It not only provides greater control compared to Wi-Fi or programmable thermostats but also emphasizes intelligent usage.
The smart thermostat is a great invention of today’s modern technology, which has completely changed the concept of heating and cooling systems. It not only provides greater control compared to Wi-Fi or programmable thermostats but also emphasizes intelligent usage.
Thoughtfully designed by adding a host of features such as energy tracking, proximity sensor, geofencing, and device interfacing, the smart thermostat can help save energy costs on heating and cooling in the long run while providing an even more seamless experience. To avail of such benefits, you need to make sure your product is compatible with your home system and cables beforehand.
Aside from that, you should re-confirm that the spot of your existing thermostat is the right place for a new one. However, some reputable smart thermostat manufacturers, such as Google Nest, Ecobee, and Honeywell, distribute home checklists and compatibility tools online to ensure their products will work perfectly with the wiring installed in your space.
After confirming everything is in your favor, get ready for your smart thermostat installation. This is going to be really interesting! But of course, if you’re confident about doing the installation yourself, call an HVAC specialist from Smile HVAC.
What tools/materials do you need to install a smart thermostat?
• 1 Smart thermostat
• Smartphone
• 1 flathead and 1 Phillips head screwdriver
• Screws
• Drill, if required
• Joint compound
• 1-C wire adapter (optional)
Step-by-step guide on how to install a smart thermostat
Installing a new smart thermostat in the same old location isn’t always a smart choice. Your brand-new smart thermostat needs to be installed on an interior wall where harsh temperature influences such as a window, air vent, or direct sunlight will not reach your device.
If your sense is not allowing you to accept the previous one is not an ideal place, contact an HVAC professional to reattach the wires. Once your inspection has been done, start installing your new device with the below steps. Note that installation might vary from specific thermostats to your manufacturer’s instructions. Be sure to check the owner’s manual or installation guide thoroughly.
Step 1: Disconnect your HVAC system
To remove your existing thermostat, be sure to disconnect your entire HVAC system at the breaker panel. HVAC units are often powered by two circuit breakers with attached switches, or the breaker may be one large breaker with a wide switch. Doing so will turn off the power to your device and protect you from potential hazards such as electric shock.
Older battery-operated thermostats may still appear to be on, even when the unit is turned off. To make sure everything is disconnected, turn on the HVAC system at your thermostat and listen to the signals. Adjusting the temperature of the device is another best and easiest way to test it.
Step 2: Loosen the screw on the old thermostat to remove the cover
Removing the cover of your existing thermostat gives you access to the backplate and low-voltage wiring. Taking the faceplate off might take a bit of time and effort. If you can’t pop right away, stop forcing it. Check for invisible or small screws; mainly, see below. Remove them first; instead, contact your HVAC specialist or electrician.
Step 3: Assess the old thermostat wires
For most smart thermostats, the suggested wiring is 18/5, which comprises 5 individual plastic-coated thin wires, each with an 18-gauge thickness. These wires will be covered in a big bundle. When the bundles of wires come out of the wall, they will spread out and connect back to the smart thermostat. If you see a black or blue wire, it should be a C-wire. If this wire is in use, mark the attached terminal with a C.
At that point, don’t forget to take a view of the wiring and the entire set-up with your camera or smartphone. Capture the lines that are connected to which terminals. In some cases, the thermostat includes stickers on the terminals to label the wires with codes. Take the wires off before you start disconnecting them.
Step 4: Dislocate Cables from the old thermostat
Take off the wires from the back panel of the old thermostat. Connect a label with its description to each wire before you begin removing it. Be sure not to disconnect the short wire that is connected to the Rh, Rc, or R terminals.
Step 5: Take off the backplate
Next, you need to remove and disconnect the thermostat cables from the old trim plate/backplate. Based on the thermostat model, you may need to back out small screws that occupy the wires in place. Or, use a pen or pencil to tap the little tabs to release the cables. Simply remove the backplate using a screwdriver to loosen the screws on the wall.
Step 6: Add a C-wire (if required)
You do not need to follow this step if you already have a C-wire connection to your HVAC system. If it is not installed, it is recommended that you use C-Wire to provide power to your new device.
Some popular thermostat manufacturers, including Google, ecobee, and Honeywell Home, sell an adapter for their product so that buyers can connect C-Wire. Or, you can add a wire adapter from a third party that comes with special guidelines. If you are not sure that you can install the wire, it is highly recommended that you consult an HVAC specialist to connect it.
Step 7: Use your new backplate as a stencil
The next step is to take the new smart thermostat’s black plate and mark the interior wall using a pencil. Make a small hole by drilling as the backplate screw marks. If necessary, you will need to install anchors to the wall. Before screwing it into the wall, make sure the smart thermostat wires are through the backplate.
Step 8: Attach the thermostat wires
Attach the thermostat cables to their respective terminals after successfully attaching the black plate to your interior wall. To place wires securely in their position, check the visuals you’ve taken previously.
Step 9: Assemble the new front cover
With the wiring supported, you will be able to install the front cover of your new smart thermostat onto the backplate. If you have trouble connecting it, stop forcing it. Place them back in the interior before attempting to locate the faceplates again. The next step is to turn on the breaker for your heating and cooling system. Doing so will help restore power to the smart thermostat, resulting in a start-up.
During this step, locate the monitor plate to the backplate of your smart thermostat. Once this is done, you can hear it snap firmly into place.
Step 10: Sync the smart thermostat to Wi-Fi
Finally, your new smart thermostat device has turned on. But, you may have to go through a series of quicks to sync it to Wi-Fi. Plus, setting up its compatible smartphone app will often take time. Depending on the model and make, these steps may vary slightly. Hence, you are suggested to follow the manual instructions carefully. Eventually, enjoy using your new appliance and start saving money on your electric bill.
Final Words!
Replacing or adding a new smart thermostat can be daunting. With the right cable connection, it’s super easy to install. Be sure to determine your thermostat’s functionality before installing it. That’s it for this post! Hopefully, you will be able to set up your smart thermostat yourself with this step-by-step guide.